


Which is the cleaner room in your living space — the kitchen or the bathroom? Often, the bathroom is the more sanitary spot.
“Thekitchen sink typically has more germs than a toilet,” saidBecky Rapinchuk, a cleaning expert known as Clean Mama.While most people stow food in the fridge and give at least a halfhearted wipe to counters, Rapinchuk said most kitchens she’s encountered “aren’t thoroughly cleaned”.
You’re in good company.
We talked to experts about smart ways to tackle some of the germiest, grimiest parts of your home. They told us what to clean, how often you need to clean it and the best way to get the job done. The good news is that it won’t take too long.
“It just requires maintenance and daily upkeep,” Rapinchuk said.
And the benefits run much deeper than you might think.
“A clean kitchen is an immediate mood booster because it’s often the heart of the home,” said Wendy Saladyga, stain expert at Persil ProClean Laundry Detergent.
Still, that “heart” can get very messy, very quickly. A recent Persil research study showed that the majority of adults admit to a host of sloppy kitchen behaviors, including spilled condiments or sauces (66%), thrown/dropped food on the floor (63%) and spilled drinks (62%). If that’s the sort of thing happening on the regular at your place, you’ve got your work cut out for you. So, let’s get started.
Developing a strategy will make cleaning less stressful.
As important as it is to do thorough kitchen cleaning, you can give yourself permission to take things nice and easy. You don’t have to tackle everything at once, so pick one or two of these items to deep clean, then move on next week to a couple of new ones.
In between bigger projects, don’t lose focus on keeping the food preparation surfaces clean.
“They need to be wiped down before and after each use, and should get a good cleaning once a week,” said cleaning expert Katie Berry of HousewifeHowTos.com. “This keeps harmful pathogens under control and prevents foodborne illness. You should also wipe handles and switches at least once a week and clean spills on the floor when they happen. These steps keep grime from building up and attracting pests.”
“Even if you fall behind and the grime builds up, it’s still work taking the time to deep clean,” Berry said. “You don’t need a lot of expensive products, because simple solutions like warm, soapy water, baking soda and vinegar can all be very effective.”
Refrigerator: Timing matters when you’re cleaning a big appliance, experts said. When it comes to the fridge, it’s easier to clean if it isn’t full.
“Wipe out the inside before you go grocery shopping, when it’s emptiest,” Rapinchuk suggested.
That should help with basic upkeep, but the fridge also needs twice-yearly deep cleans, according to Jill Bauer, home and lifestyle contributor on the ”Today” show.
“I usually do these cleans in fall, before the holidays, and then again in spring,” Bauer said. “I take everything out of the fridge and wipe off all the jars and bottles with a microfiber cloth. They’re less wasteful than paper towels for a big project like this. Plus, the fibers are like little mini scrubbers that loosen things up.”
“Then I clean the inside of the fridge, starting at the top and working down. I have a small bowl or bucket of warm water with a bit of dish soap to cut through grease. Sprinkling baking soda directly onto tough spills helps them lift up. Once it’s been wiped down completely, I go back and dry it all off with a fresh microfiber cloth.”
Don’t forget to give the exterior a good wipe-down, too. If it’s a stainless steel surface, Bauer offered this tip: “There’s a ‘grain’ to the surface, which is either vertical or horizontal, so wipe in the direction of the grain.”
During one of your semiannual fridge deep-cleans, you also need to clean the refrigerator coils, Berry added.
“Over time, dust and debris can build up there, causing your fridge to work harder and use more energy. At least once a year, unplug the fridge, locate the coils, which are usually on the back or bottom of the unit, and use a vacuum or coil brush to remove any dirt and debris. It’s a simple step that can help improve the efficiency of your fridge and save you money on your energy bill in the long run.”
Now that this refrigerator is so clean, how can you help it stay that way?
“Between cleanings, keep your fridge tidier by lining your produce and meat drawers with paper towels to catch drips. changing them out weekly,” Berry said. “And always wipe the bottom of containers before you put them in your fridge.”
 Can you even imagine having a refrigerator that looks like this on the inside?
Microwave: This once-a-week suggestion from Bauer can make a big difference in what’s usually one of the grubbiest spots in the kitchen.
“I fill a two-cup Pyrex measuring cup with water and squeeze in the juice of half a lemon,” she said. “I put the cup in the microwave and run it for five minutes. The water will be at a vigorous boil, but don’t open the door. Instead, let it sit for another five minutes. Steam will build up and loosen all the gunk, so all I have to do is wipe it down. Not only is it clean, but it smells fresher, too.”
Oven: Berry suggested making a thick paste from baking soda and water and “painting” it onto the walls and floor of the oven, avoiding the heating element.
“Let it dry, then fill a spray bottle with white vinegar and spritz the oven interior,” she said. “It’s going to fizz like crazy, which is dislodging grime. Wipe it away with a warm, soapy rag once the fizzing stops, then go over that with a clean, damp rag.”
Dishwasher: Sometimes we forget that the things we use to clean also need to be cleaned themselves. That’s certainly the case with the hard-working dishwasher.
Bauer suggested a monthly check of the filter, usually found in the bottom of the unit.
“Take it out and give it a rinse under warm running water,” she said. To clean the interior, she offered this tip: “Take a Pyrex cup and put it on the top rack. Then add one cup of water and one cup of vinegar, and run a cycle with just that cup in it.”
Toaster: “They can collect a surprising amount of crumbs and debris,” Berry said. “Start by unplugging the toaster and turning it upside down over the sink. Tap the bottom to dislodge any crumbs that may have collected in the slots. Then, turn it right side up again and use a pastry brush or clean toothbrush to remove any stubborn bits that may be stuck inside the slots.”
“Next, take out the crumb tray and wash it either in the sink or dishwasher, depending on the manufacturer’s instructions. Make sure everything is completely dry before reassembling the toaster and plugging it back in.”
Towels and mops: “Kitchen towels are a great cleaning tool for your kitchen, but keep in mind they should also be cleaned,” Saladyga said. “I recommend washing kitchen towels every three to five days, so you can be confident that they’re clean when you use them to wipe counters.”
“If your mop has a detachable head, I recommend washing it after every use on the hot water setting,” she added. “Afterwards, allow the mop head to air dry completely before reattaching it to the mop handle.”
Kitchen trash can: “It’s not a glamorous thing to clean, but keeping it free of grime is an important part of keeping your kitchen free of odors and pests,”Berry said.“Take it outside if possible and fill with several inches of warm water, then add a splash of dish soap. Let that sit for several minutes, then use a long-handled brush set aside for just this task and scrub the interior. Dump and rinse it, then let it air-dry in the sunlight for added disinfection.”
Want the can to stay fresher longer? “Line the bottom with old newspapers or even junk mail, sprinkle a light layer of baking soda on top, and then add your trash bag,” Berry said. “The paper and baking soda will catch any messes dripping through holes in the bag, so you can swap those as needed when you take out the trash.”
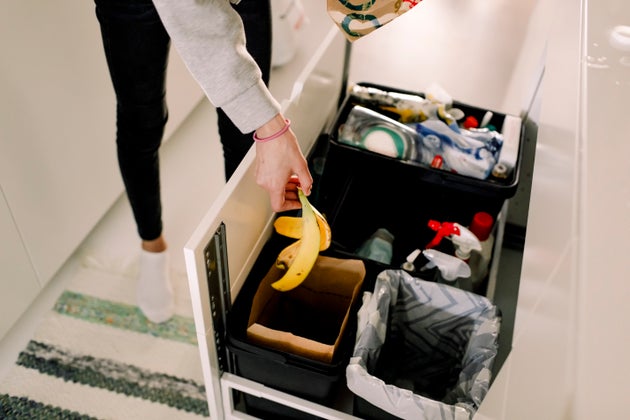 The smell of that banana peel can last long after the trash has been taken out.
Small cookware (slow cooker, air fryer): “Wipe the exterior with a damp microfiber cloth after each use,” Rapinchuk said. “Most inserts can be washed in the dishwasher. And don’t forget to clean the cord, too.”
If you’re noticing an odor from the silicone gasket in your instant pot, try this tip from Bauer: “Make a paste of baking soda, rub it on, and let it sit,” she said. “It’s a great absorber, and you can rinse it off once it’s had enough time to work.”
Coffeemaker: “Running a tank of half vinegar and half water is an easy way to descale your coffee maker,” Berry said. “Follow it with another tank of plain water, then unplug the machine and let it cool. Wipe the nonremovable parts with a warm, soapy rag and go over them again with a clean, damp cloth. Wash the movable parts in the sink or dishwasher. Get rid of any crusty buildup in your coffee pot by sprinkling a thick layer of salt on the inside then scrub that with the cut side of half a lemon. The combination will loosen the burned coffee and deodorize that funky smell, too.”