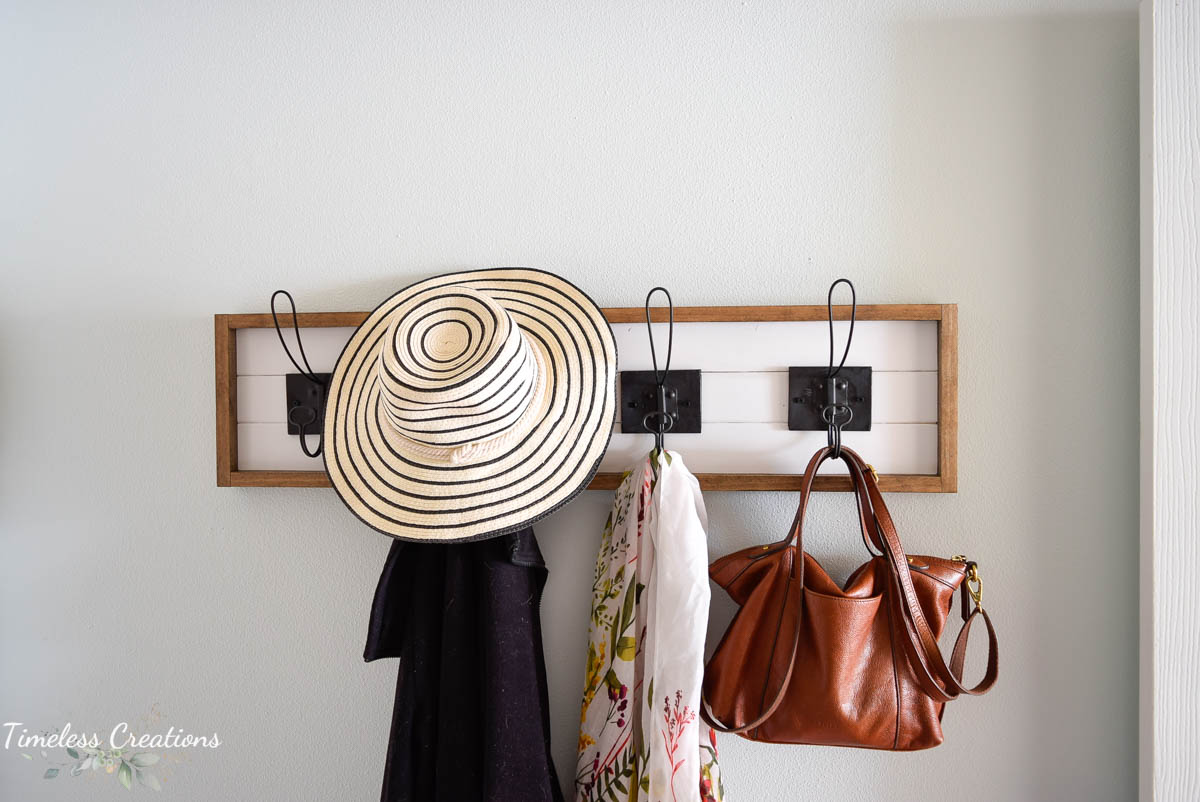
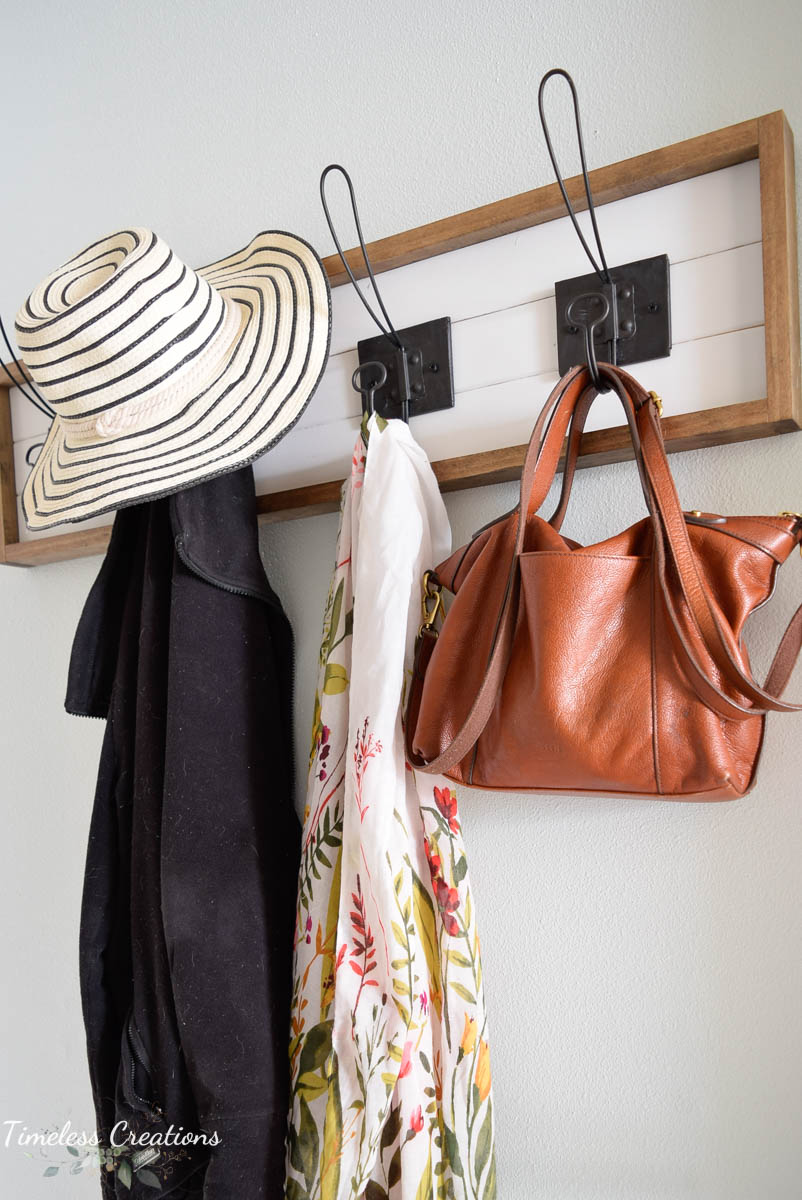
Hello! We recently did a super easy DIY project this winter over at Kristen’s house for a simple coat hanger with that popular farmhouse style. We have used this technique before to make picture frames, a headboard and organizational boards too. You can pretty much use this shiplap technique for anything your heart desires!
While Kristen has a small coat closet in her home, it is situated by the front door which during the winter months is not used as much. Over by the attached garage there is a small laundry room which is where we decided we needed a very small spot for wet winter boots and our everyday coats so they were more accessible each day.
While this laundry room wasn’t large enough for cubby space we opted for a small hanging coat rack instead! Here is what you will need to complete this project:
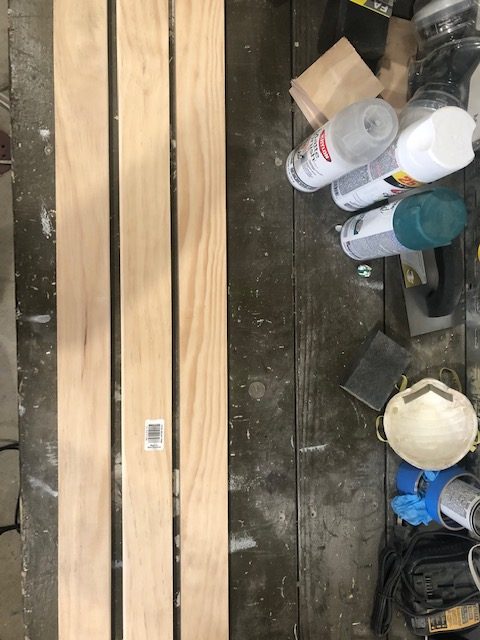
- 1×3 pine board for back “shiplap” boards
- 1×2 pine board for outside frame
- orbital sander and sand paper
- wood glue
- nail gun and nails
- white paint
- stain
- miter saw
- coat hooks
To begin, determine the length you want your coat hanger to be. I used leftover boards that I already had in the garage so that kind of determined how long I cut them! For reference, we used the miter saw to cut our 3 back “Shiplap” boards approximately inches long. Don’t mind my “saw-dusty” work bench!
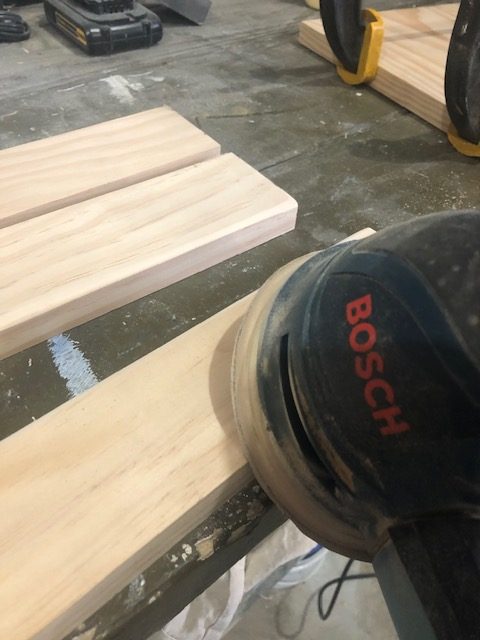
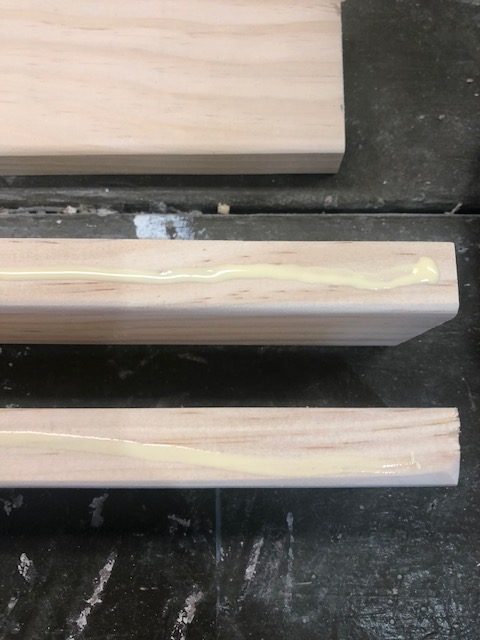
Your next step is to take each “shiplap” back board and sand down the edges so they are rounded. You only need to round each inside long edge. So leave all the outside edges that will be against your frame straight.

Next, after your edges are rounded you can wood glue and clamp these 3 boards together, with your rounded edges on the inside. Keep them clamped for at least 30 minutes.

At this time, after the glue has dried you can begin painting and staining. I used a white chalk style paint to paint the “shiplap” boards. And this stain for the 1 x 2 board for the frame. I always stain the frame board first before cutting it.
Once all of that is dry you can then cut your frame sides. I always cut 2 corresponding sides, glue, then add those two to the shiplap using my nail gun. Once those are attached I then cut and attach the last two sides – I do this to make sure I can get the most accurate measurements for all sides.
Last, but not least is to attach the hangers! HERE are the hangers I used, but they attach weirdly on the back with screws that were too long for this board. You could get different ones or just do what I did and use a drill bit to drill new holes on each side of the back plate. I then used smaller black screws to screw it directly to the shiplap backboards.
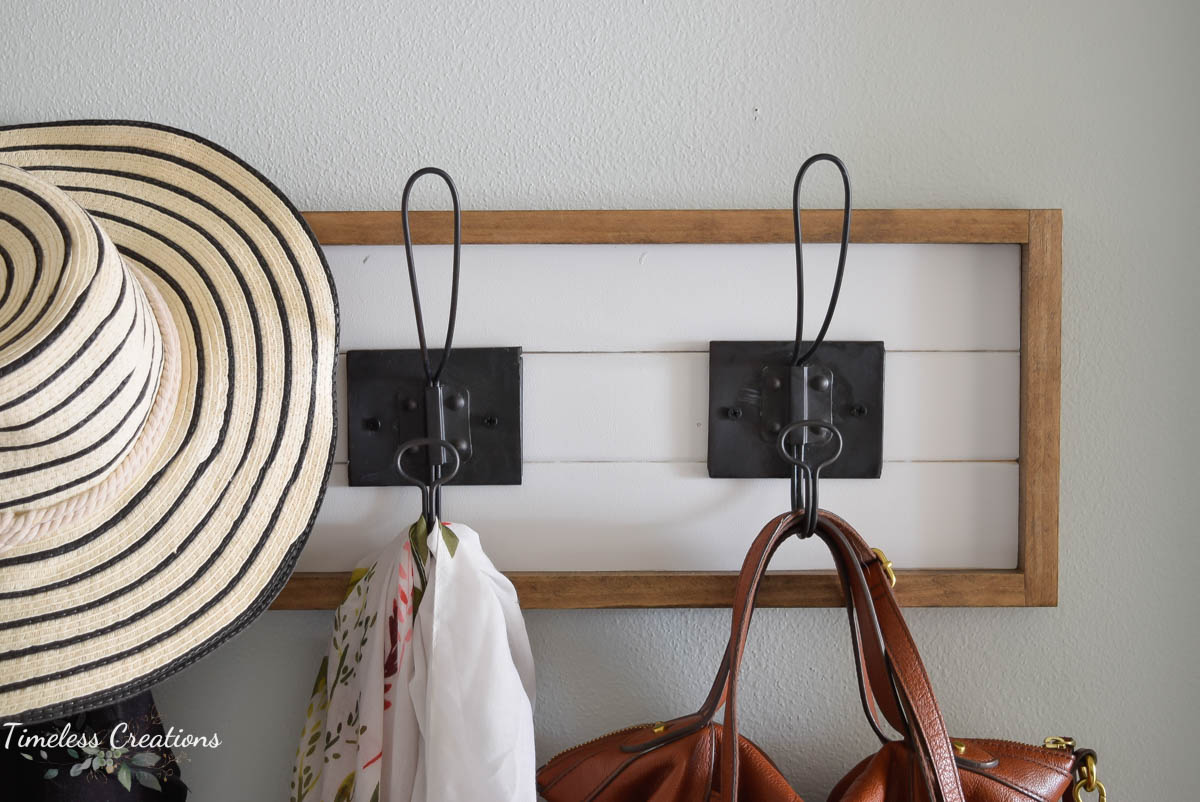
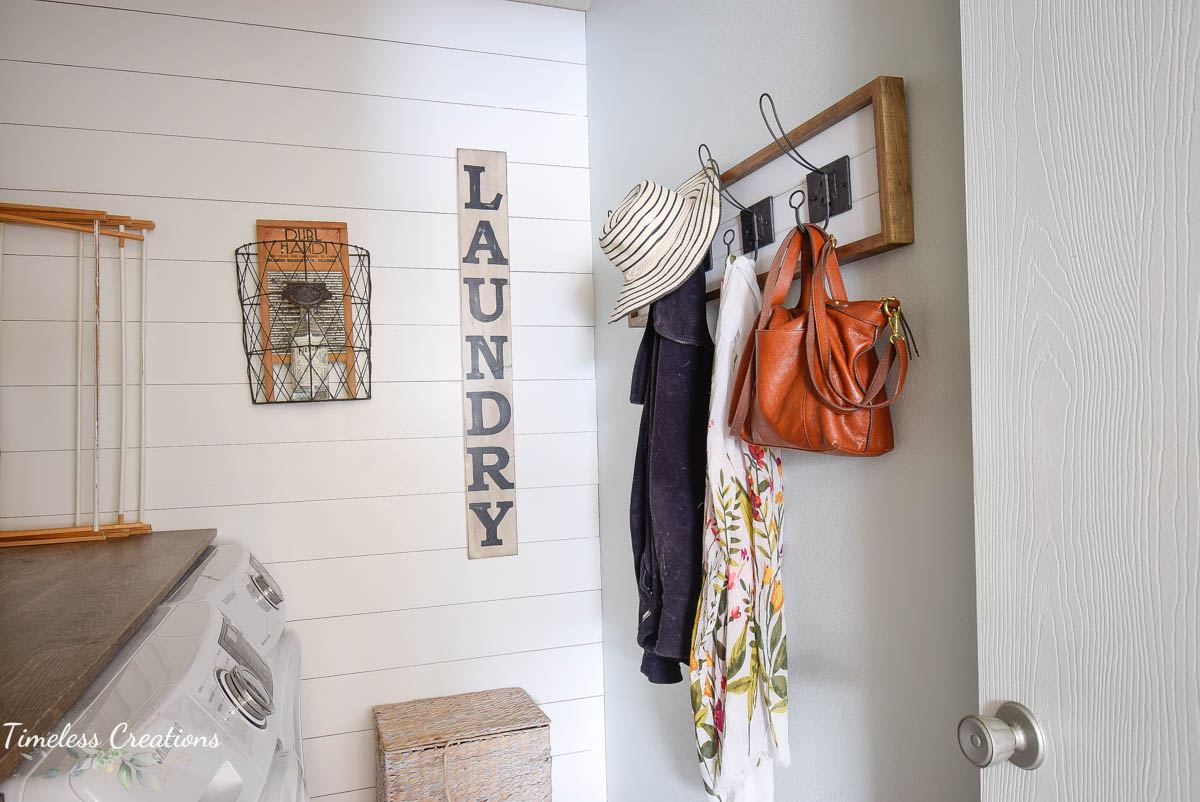
Didn’t it turn out so cute?! And what a simple DIY that looks great! You could also use this in the bathroom for hanging towels too. I may do that in my new house if I end up building some kind of cubby system in our laundry/mudroom area for coats. We will see!